If the first layer is bad, the rest of the print will be bad too – or the print comes loose halfway. Fortunately it is the easiest thing to master.
Filament manufacturer's guidance comes first. Every manufacturer has its own formulations and publishes its own parameters – nozzle, bed and chamber temperature, drying, cooling. Even the same material (e.g. PETG) from two brands may need different settings. Treat the values in this guide as a starting point: check the technical data sheet (TDS) and the spool label first, and if something is missing, ask the filament manufacturer for guidance.
1. A clean plate
Grease from fingers is enemy number one. Wash the PEI plate with warm water and washing-up liquid and wipe it dry; between prints you can wipe it with isopropyl alcohol (IPA). Do not touch the print surface with your fingers.
2. First layer height (Z offset)
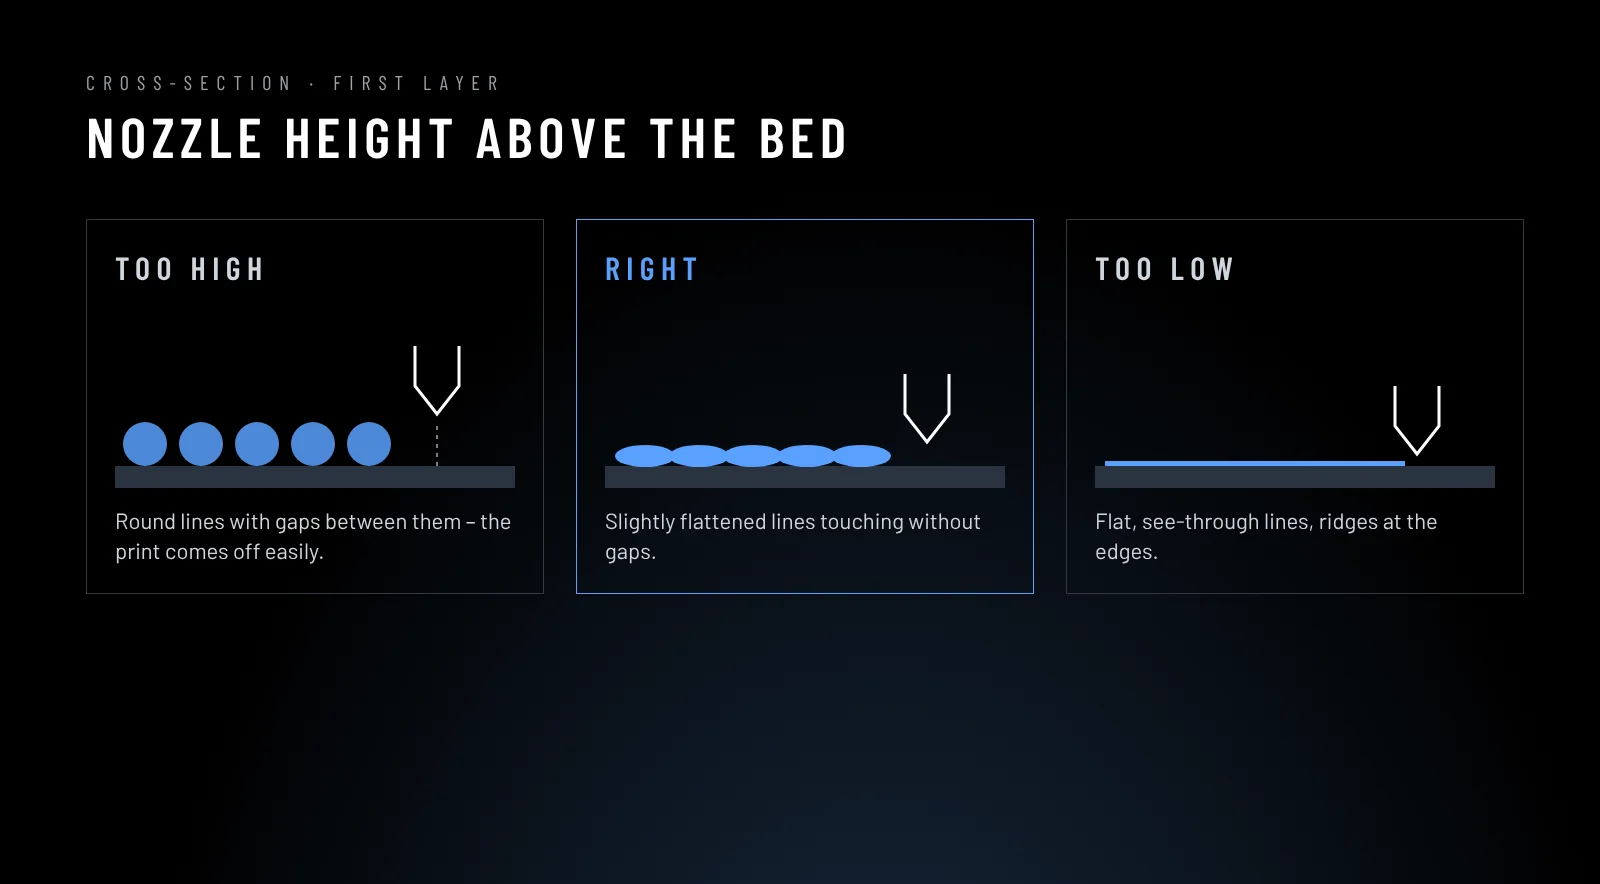
- Too high – lines are round, do not join, gaps are visible; the print comes off easily.
- Too low – lines are flat and see-through, ridges form at the edges, the nozzle ploughs through the material.
- Right – lines slightly flattened, touching without gaps, a smooth and even surface.
On Klipper printers you adjust Z offset while the first layer prints (baby-stepping) in small steps, e.g. 0.01–0.02 mm, and save the result. Print a simple one-layer square in the centre and in the corners of the bed.
3. Profile settings
- first layer speed: slower than the rest (e.g. 30–50 mm/s),
- nozzle temperature on the first layer: +5 °C,
- cooling on the first 1–3 layers: off or minimal,
- for large flat ABS/ASA/PA parts: a brim and a closed enclosure heated before the start.
4. PETG on smooth PEI
PETG can stick too well and tear a piece out of the plate surface. Use a textured plate or a thin release layer (e.g. glue stick), and do not squish the first layer as hard as with PLA.
Warping – corners lifting
The cause is material shrinking as it cools. What helps: a higher bed temperature, a closed enclosure (ABS, ASA, PA), no draughts, a brim, rounding sharp corners in the model, less cooling.
Judging the first layer by eye
- Too high – round “noodles” with gaps between lines, the layer peels off easily.
- Too low – the layer is transparent and rough, the nozzle leaves grooves; excess plastic builds up at the edges.
- Right – lines slightly flattened and touching, a smooth, even surface across the whole bed.
A large bed is a challenge of its own
On a 600×600 or 1200×600 mm bed, a few hundredths of a millimetre of flatness make the difference between a perfect and a lifted layer. That is why Revon printers measure the bed with a probe and compensate unevenness with a mesh – in Revo OS you see it in colour in Revo Panel, with the spread in millimetres. Before an important, long print, take a new measurement, especially after changing the plate or making a big change in bed temperature.
First layer on a belt (Revon Belt)
On a belt printer the first layer matters even more – it holds the print on the inclined, moving belt. A clean belt, the right temperature and calm first-layer speed decide the whole series.
Back to the new filament checklist.