A short guide for every new spool – from unboxing to the first print. Print it out and hang it next to the machine.
- Unpack and check – the spool label and the manufacturer’s technical data sheet (TDS): temperatures, drying, bed. That is your starting point.
- Dry it – always. New does not mean dry: every spool picks up moisture in the factory, in transit and on the shelf. Dry it as the manufacturer recommends.
- The right nozzle – carbon or glass fibre filaments (CF / GF) only on a hardened steel nozzle. Change the nozzle only with the 7 mm wrench.
- Load in Revo OS – machine screen → Filament → Load. Wait until clean, even material comes out of the nozzle.
- Clean plate – no fingerprints. Choose the smooth or textured plate and set the same one in the slicer.
- Wizard in [r]evo Slicer – Calibration → New Filament Wizard: temperature, flow, max flow, pressure advance, retraction. At each step you click whatever looks best on the print.
- Save the profile – brand + material + colour. Each colour separately: the pigment changes how the filament melts.
- First print – select the new profile before slicing. After the job, store the spool airtight with a desiccant.
Before you start
- Manufacturer’s recommendations first. Every manufacturer has its own recipes – even the same PETG from two brands may need different settings. The wizard values are a starting point; the TDS and the spool label take priority.
- One slicer. We prepare profiles for the machines we build and service in [r]evo Slicer and Orca Slicer. Copying settings “by eye” into another slicer changes the names and meaning of parameters.
- Leave the printer profile alone. Kinematics, input shaping and limits are already calibrated – you calibrate the filament profile.
Order matters
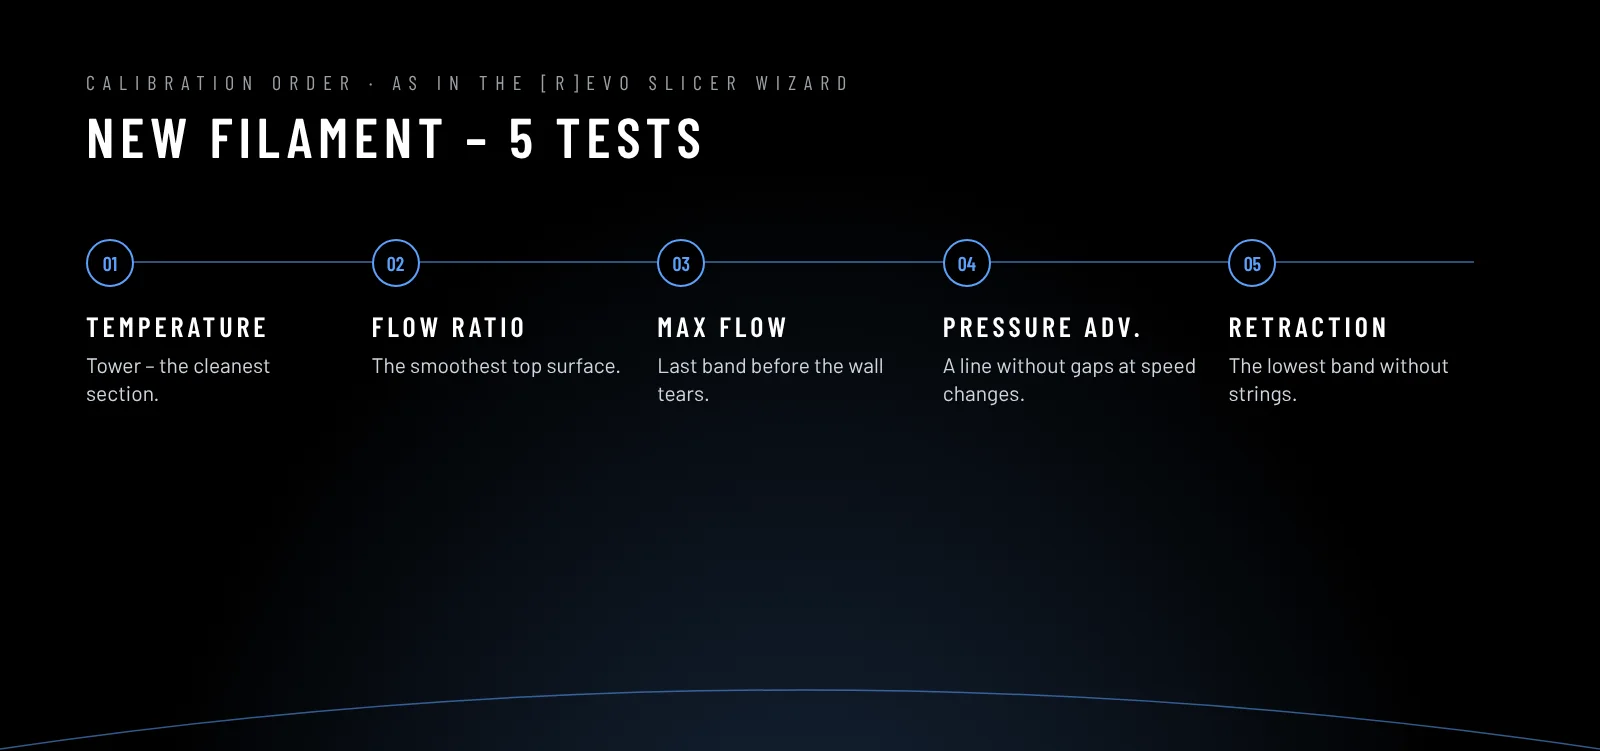
Temperature affects flow, flow affects pressure advance, and pressure advance affects retraction. That is why the wizard always goes the same way: temperature → flow ratio → max flow → pressure advance → retraction. Details of every test: filament calibration step by step.
Related: drying filament, starting temperatures, first layer and Z offset.
If something goes wrong
Before you change several parameters at once, check the most common problems at the start. Change one thing at a time and write down what you changed – together with the calibration date and the nozzle.
Would you rather have someone who does this every day do it? We calibrate filaments and prepare ready profiles – get in touch.
Current versions of [r]evo Slicer are prepared for machines running Revo OS that we have commissioned. Do you have a machine from us or want Revo OS on your own? Write to us.