All the printers we build run Klipper, and you prepare files for them in [r]evo Slicer – our slicer based on Orca Slicer. Everything we write here about Orca Slicer works the same way in [r]evo Slicer. This article explains how the two work together and what is worth knowing before you start changing settings.
How Klipper works
Klipper is firmware in which motion is calculated by a computer (usually a Raspberry Pi or similar), while the printer board only executes commands. This lets the printer print faster and more precisely, and you change the configuration in a text file instead of compiling firmware.
- printer.cfg – the main configuration file: pins, motors, heaters, sensors, limits,
- Moonraker – the service that connects Klipper to the web interface and updates,
- Mainsail or Fluidd – the browser interface: preview, console, file editing, macros.
Basic calibrations in Klipper
- Heater PID –
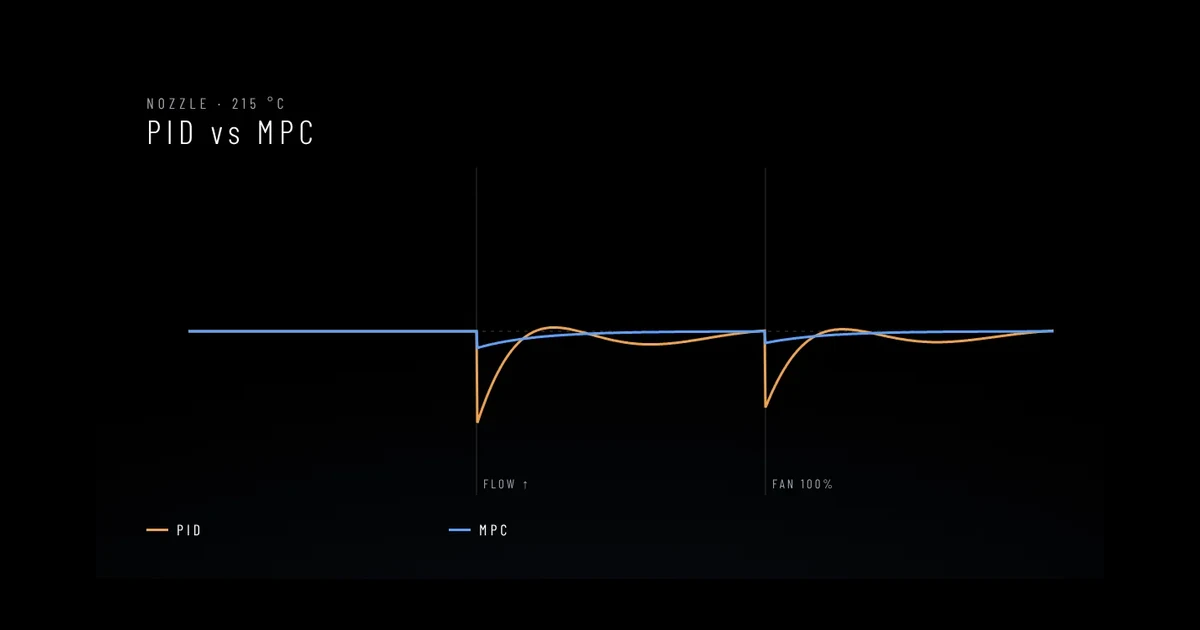
PID_CALIBRATE HEATER=extruder TARGET=250and likewise for the bed (HEATER=heater_bed), thenSAVE_CONFIG. Stable temperature means no bands on the walls. On Revon printers we use MPC instead of PID. - Z offset – with a probe
PROBE_CALIBRATE, and small corrections while printing (baby-stepping) with the value saved. - Bed mesh –
BED_MESH_CALIBRATEmeasures the bed’s unevenness and Klipper compensates for it while printing. On large beds it is essential. - Input shaper – with an accelerometer (e.g. ADXL345)
SHAPER_CALIBRATEmeasures frame resonances and selects a filter. It removes ringing and allows higher accelerations.
After every mechanical change (new toolhead, different bed, frame rebuild) repeat these calibrations.
Start macros
The PRINT_START macro (or a similar name) prepares the printer: homing, heating the bed and chamber, bed mesh, heating the nozzle and a purge line. In the slicer’s printer start code you call it with temperatures, e.g. PRINT_START BED=[bed_temperature_initial_layer_single] EXTRUDER=[nozzle_temperature_initial_layer]. That way all the start logic lives in one place – in the printer.
Three levels of profiles
- Printer – bed size, start and end code, machine limits. You set it once.
- Filament – temperatures, flow, pressure advance, cooling, max volumetric speed. A separate profile for each filament.
- Process – layer height, walls, infill, speeds, supports. You change it for a specific part.
The most common mistake: fixing filament problems in the process or printer profile. A problem with a new material is solved in the filament profile – see filament calibration step by step.
Updates
You update Klipper, Moonraker and the interface from Mainsail/Fluidd (update manager). Before updating, back up printer.cfg and update when you have no urgent prints – sometimes changes in Klipper require configuration fixes.
Want someone to configure it for you? Write to us – we also configure Klipper and profiles on machines from other manufacturers.
See also: input shaper · pressure advance · MPC instead of PID · Klipper vs Marlin · connecting the slicer to the printer